Often, car owners postpone the adjustment of the clutch cable for later, believing that this is not an urgent matter and may well be tolerated. However, this attitude to the problem is sometimes very expensive.
It’s no secret that even minor breakdowns can provoke dangerous situations, not only for the driver and passengers, but also for other road users. Failure in any of the clutch systems is not a joke at all, so if adjustment of the same cable is required, it should be carried out immediately.
Clutch cable
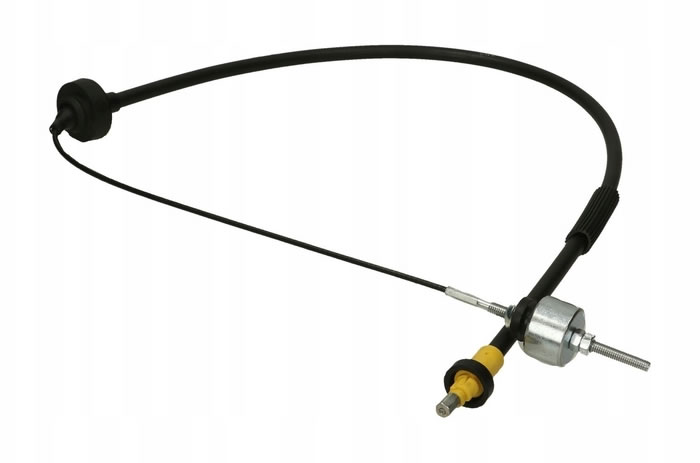
According to experts in mechanical engineering, one of the important components in a car with a manual gearbox is the clutch cable. It is located in a special shell that protects it from mechanical stress, and connects the plug to the pedal. For example, you pressed the pedal, the cable transmitted the force of the linkage, which helped the fork to change position and also contributed to the disengagement of the clutch.
Foreign manufacturers in rare cases equip vehicles with a similar mechanism. They prefer to use hydraulics, which are less problematic in their work. For domestic automobile companies, the use of this device is a common practice. Although such a system has a number of disadvantages that are known to all drivers.
During operation, the clutch cable requires periodic adjustment because the drive wears out during operation. For example, a break occurs or rust appears. In this regard, the car owner with manual transmission must know what to do if the situation described above occurs.

Next, you will learn how to independently adjust the cable. Before this, consider what this mechanism is. At one end, the cable is screwed to the pedal. The second – to the special sleeve located in the shield. At the same time, it’s thoroughly bolted to the pedal, but not so much to the sleeve that the device rotates on the axis without problems.
Why clutch cable adjustment is needed
Clutch cable adjustment is a necessary and important process in vehicle maintenance. It is carried out if there is a problem with the pedal: its stroke is more or less than necessary. In the first case, the clutch engages incompletely. As a result, the flywheel continues to come into contact with the disk, which is the follower, and thereby contributes to the fact that the friction linings wear out.
In the second case, the inclusion of the slave drive is partially. As a result, the vehicle power is reduced due to a decrease in torque during the ride. In this case, the inclusion of the disk can occur rapidly and during the soft release of the pedal, which leads to distinguishable tapping in the transmission and twitching of the machine.
If the cable is defective, then the pedal may jam. It may seem that it is very difficult to press, as if it is resisting. However, if you apply significant force to the pedal, it will fall to the floor, because the cable will break. In this case, its replacement is necessary.
The repeated slipping of the clutch is also an indication that the cable is in a malfunctioning state. “Slip” – the moment the gear changes to another position. For example, the car starts to roll on the “neutral”, as there was a spontaneous clutch actuation.
“Slip” usually occurs when the motor is overloaded. For example, during an increase in speed or on the rise.
If the cable malfunctions, leakage will be the main indicator. Leaks can occur if it is disconnected or torn. In the first case, you just need to install it back. When the car moves jerkily, the cable does not perform its functions correctly.
Vehicles that are regularly operated in adverse conditions are more likely to wear or break the cable. Although this can happen with every car, even if it has a small mileage. It also wears out during incorrect driving: when the speed is high and the start is sharp, or while driving the driver constantly keeps his foot on the clutch, which leads to slipping and a malfunction.
How is the clutch cable adjusted
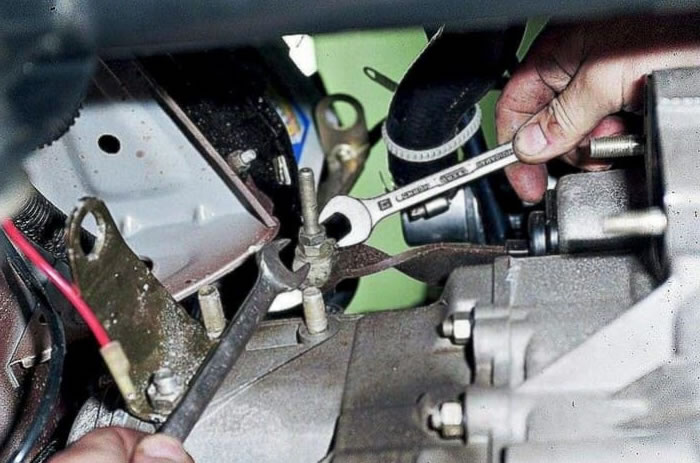
If you have a manual gearbox, you need to adjust the clutch cable. We find a bolt under the hood with which the adjustment takes place. To gain access to the desired nut, first unscrew the lock nut.
To check the results of the work done, you need to press the clutch pedal three times and again measure the amplitude of the stroke. Adjustments should be made in a certain order:
- Using special tools, measure the distance between the switch-off plug and the end of the damper. The resulting value should be no more than 8.6 cm. The largest permissible deviation is 5 mm in each direction.
- Next, you need to find out the distance from the end of the damper to the tip of the rope. The obtained value should not exceed 6 cm, a deviation of 5 mm in one or the other direction is also acceptable.
- If the distance obtained is higher than the permissible number, adjust the clutch cable. This will help the adjusting nut, turning which, you can achieve the desired value.

- Then the pedal must be pressed several times and re-measure the distance. If the result is not as it should, then the adjustment should be repeated. If everything is normal, tighten the lock nut.
In all brands of cars, the cable adjustment is almost the same, only slight differences are possible. At the same time, the setup procedure remains almost unchanged. It is important to be careful not to tighten the cable more than necessary, otherwise it may break!
Features of adjusting the automatic clutch cable
In a engine with a mechanical drive, the pedal free play increases due to the tension of the cable. This process occurs quite often. To prevent “traction of coupling”, it is necessary to carry out adjustment of a cable of a drive of coupling when the course of a pedal is very big. A certain number of manufacturers are not advised to do this manually and therefore install automatic regulators.
The device uses a simple cable. It stretches from the clutch to where the pedal is connected. Here it is connected to a ratchet, which by its movement makes the clutch work, using a “dog” attached to the edge of the pedal.
If during the operation there is a sag provoking the movement of two or more teeth of the ratchet, the spring slightly turns it around and forces the “dog” to jump over the tooth. Such actions can remove the slack of the cable. In this case, the pedal free play is set to the amount that is required.
However, such cables also need to be tightened at regular intervals. Let’s analyze the adjustment of the clutch cable on the example of a car manufactured by AvtoVAZ Lada Priora.
In the direction of movement you need to pull out the cable, holding on to the tip. A certain force should be applied to overcome the resistance of the pedal spring. Next, you must perform the following actions, holding it in this position:
- Measure the distance between the clutch lever and the plastic end of the leash. The length should be 27 mm. You know that under the hood there is not much space. In this regard, you need to stock up in advance with wire or a wand of the appropriate size.
- If the lengths do not match, adjust by rotating the leash.
- After the clutch cable is released, the fit of the leash to the fork lever should be tight, without gaps.
- Next, press the clutch pedal three times to start the mechanism, which automatically adjusts the length of the cable.
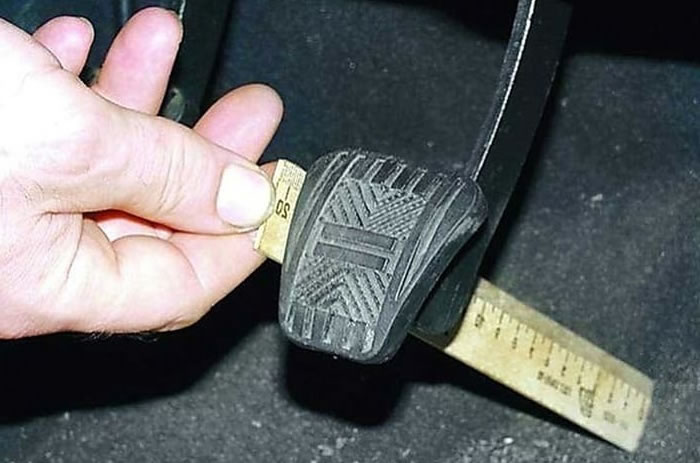
- Measure the full stroke of the pedal. The distance should be no more than 146 mm.

Owners of cars of the Lada family say that when you press the pedal, the auto-adjusting device can crack and click. Many get rid of this problem by changing the recommended length of 27 mm in the direction of decreasing or increasing. The selection method helps to find the best option.
How to install a new automatic clutch cable
Installing a new automatic cable is quite difficult to complete. In stores, it is sold in a “cocked position” and, performing some work that is related to the clutch, it should also be brought to this state.
Most drivers noticed that on a cable located under the bonnet, there are black or white clamps that are made of plastic and have a slot. At the same time, in the place of thickening of the “shirt” of the cable there are “ears” that fit perfectly into the slots of the clamp. However, there is a small problem: when the tension mechanism is in a dissolved state, then the elements are located quite far from each other.
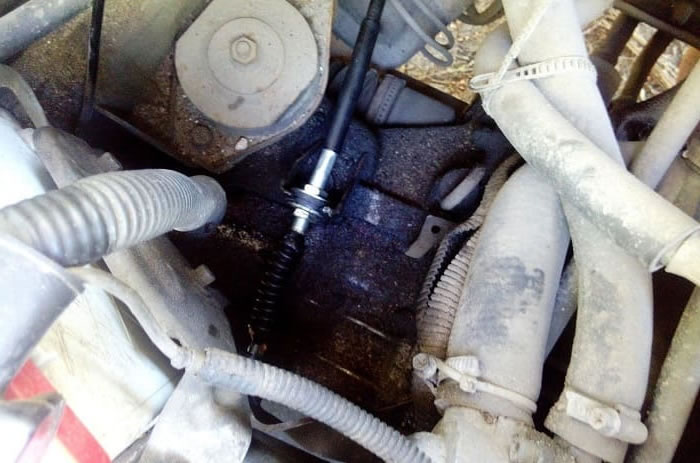
The method of adjusting the clutch cable in a position disconnected from the gearbox is not very complicated. It is necessary to perform several movements. Grasp its end with one hand, hold the base of the “shirt” with the other. This is where the self-tensioning mechanism is located. You need to stick the cable to a depth of about 5 cm in the “shirt”, then pull it towards you. At the time of its full extension, the mechanism will begin the folding process.
In this situation, you will need the help of a friend or your skill. It is necessary to fix the device in the “cocked” position by placing the clamp on the “ears”.
If you just need to disconnect the cable and the box, then first you need to press the pedal three to four times. Then press the drive lever in the place where the cable fastener is located. Push down to the ground. Everything, the mechanism has developed. Holding the lever with one hand, pull the clamp with the other.
Please note : if the lever does not want to lower, then the automatic tensioner is faulty. Cable replacement required.
Remember! It is possible to remove the fixing collar from the “ears” only when the new cable is fully installed.
How to replace the clutch cable
When the cable breaks, the movement of the machine becomes impossible. This problem is solved by replacing this device. Before removing an unsuitable element, it is necessary to conduct an inspection and take appropriate measurements of the loose part of the cable of the lower tip located next to the gearbox. Then check it visually between the attachment point and the clutch unit or gearbox (type of gearbox). Next, we look for the place where it connects, and carefully unhook it from the block or gearbox, pulling it into the passenger compartment through the engine compartment.
If necessary, remove the part of the floor that is under the pedal to make replacement easier. At the end, we disconnect the pedal and the cable. After that, we get the damper from the bracket located on the box. To install a new item, you need to perform all the steps in the reverse order.
The new cable is first connected to the pedal. Then we tighten it back to the clutch or gearbox and fix it. The last step is to install the floor under the pedals.
The clutch cable has been replaced. Further adjustment is necessary. Professionals recommend performing these actions not only when a replacement has been made, but also every 15-17 thousand km of track. This advice is simply explained: the pads located on the clutch disc wear out over time and contribute to loosening the pedal. As a result, the adjustment of this element is simply necessary as a safety measure during operation of the machine.


Recent Comments